Alert
In RISKEN, we have implemented a feature that generates alerts and sends notifications when problematic data is discovered. This section explains how to operate alerts.
Checking Alerts
- By setting the alert conditions in advance, you can check the problematic areas on the alert screen.
- To check the generated alerts, click Alert > Alert from the left menu.
- The currently active alerts will be displayed.
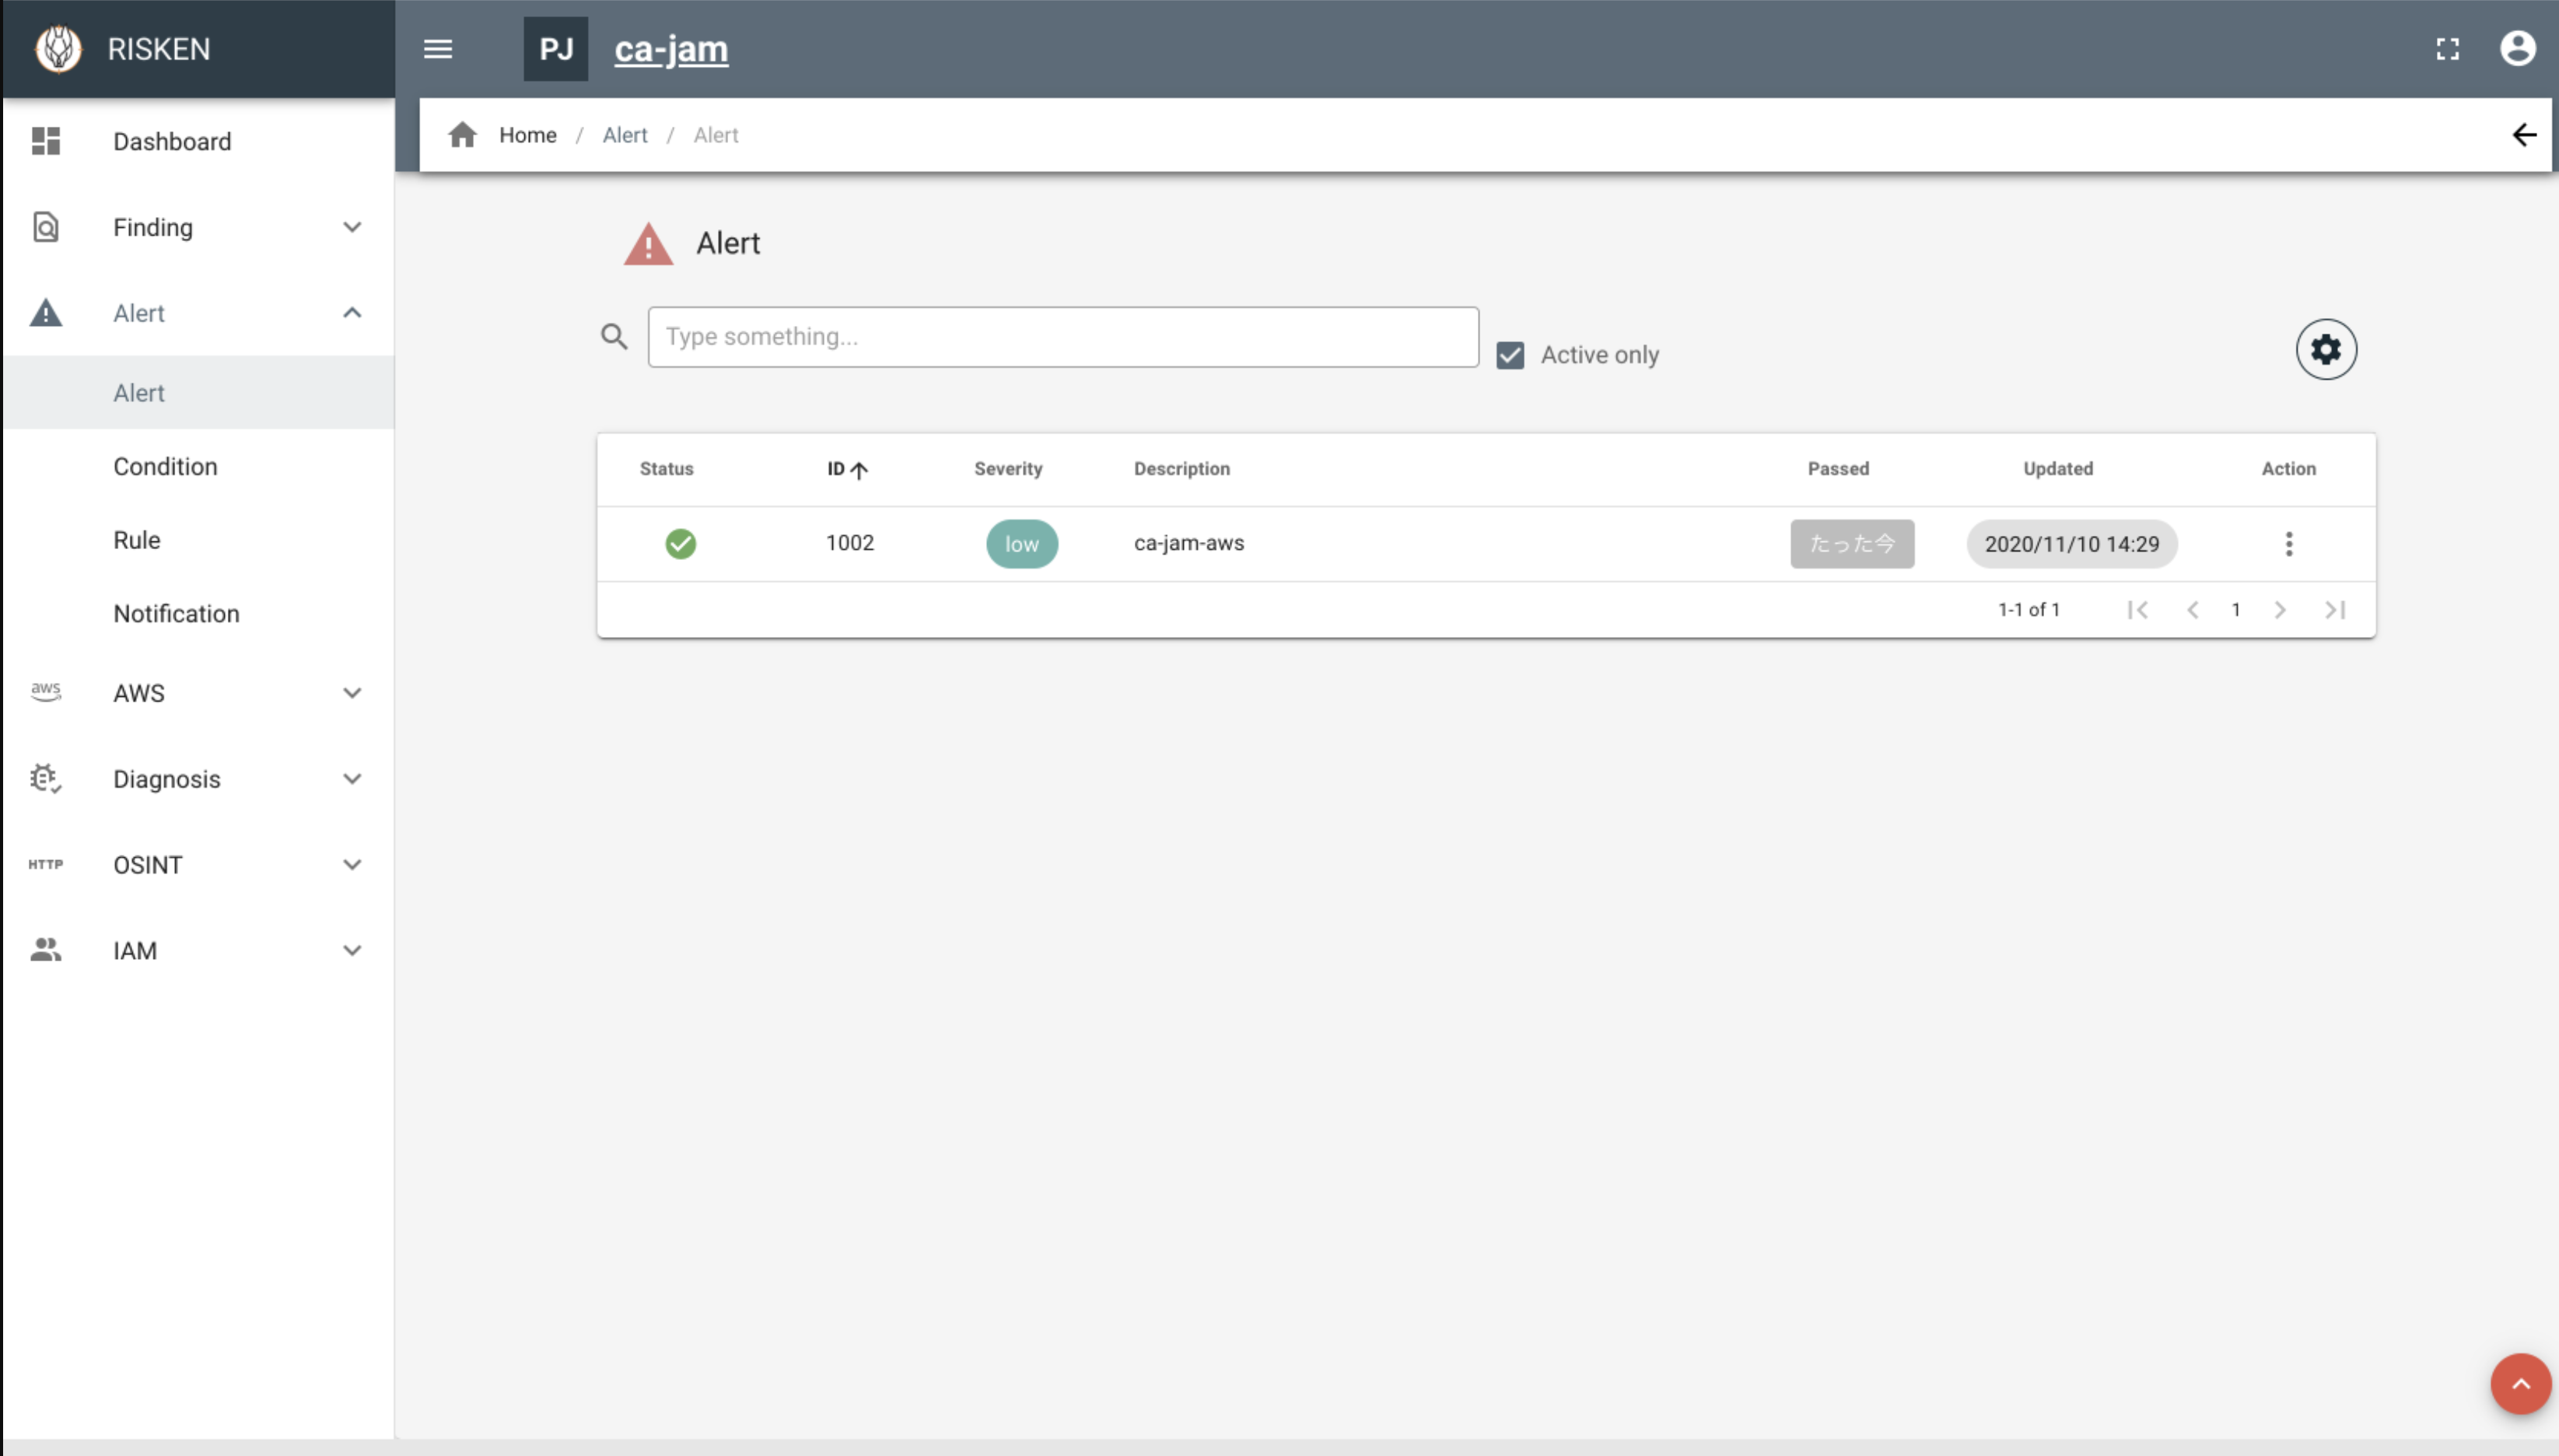
- You can filter the alerts using the text box.
- By unchecking Active Only, you can view past alerts.
- To view the details of an alert, click on the data in the list.
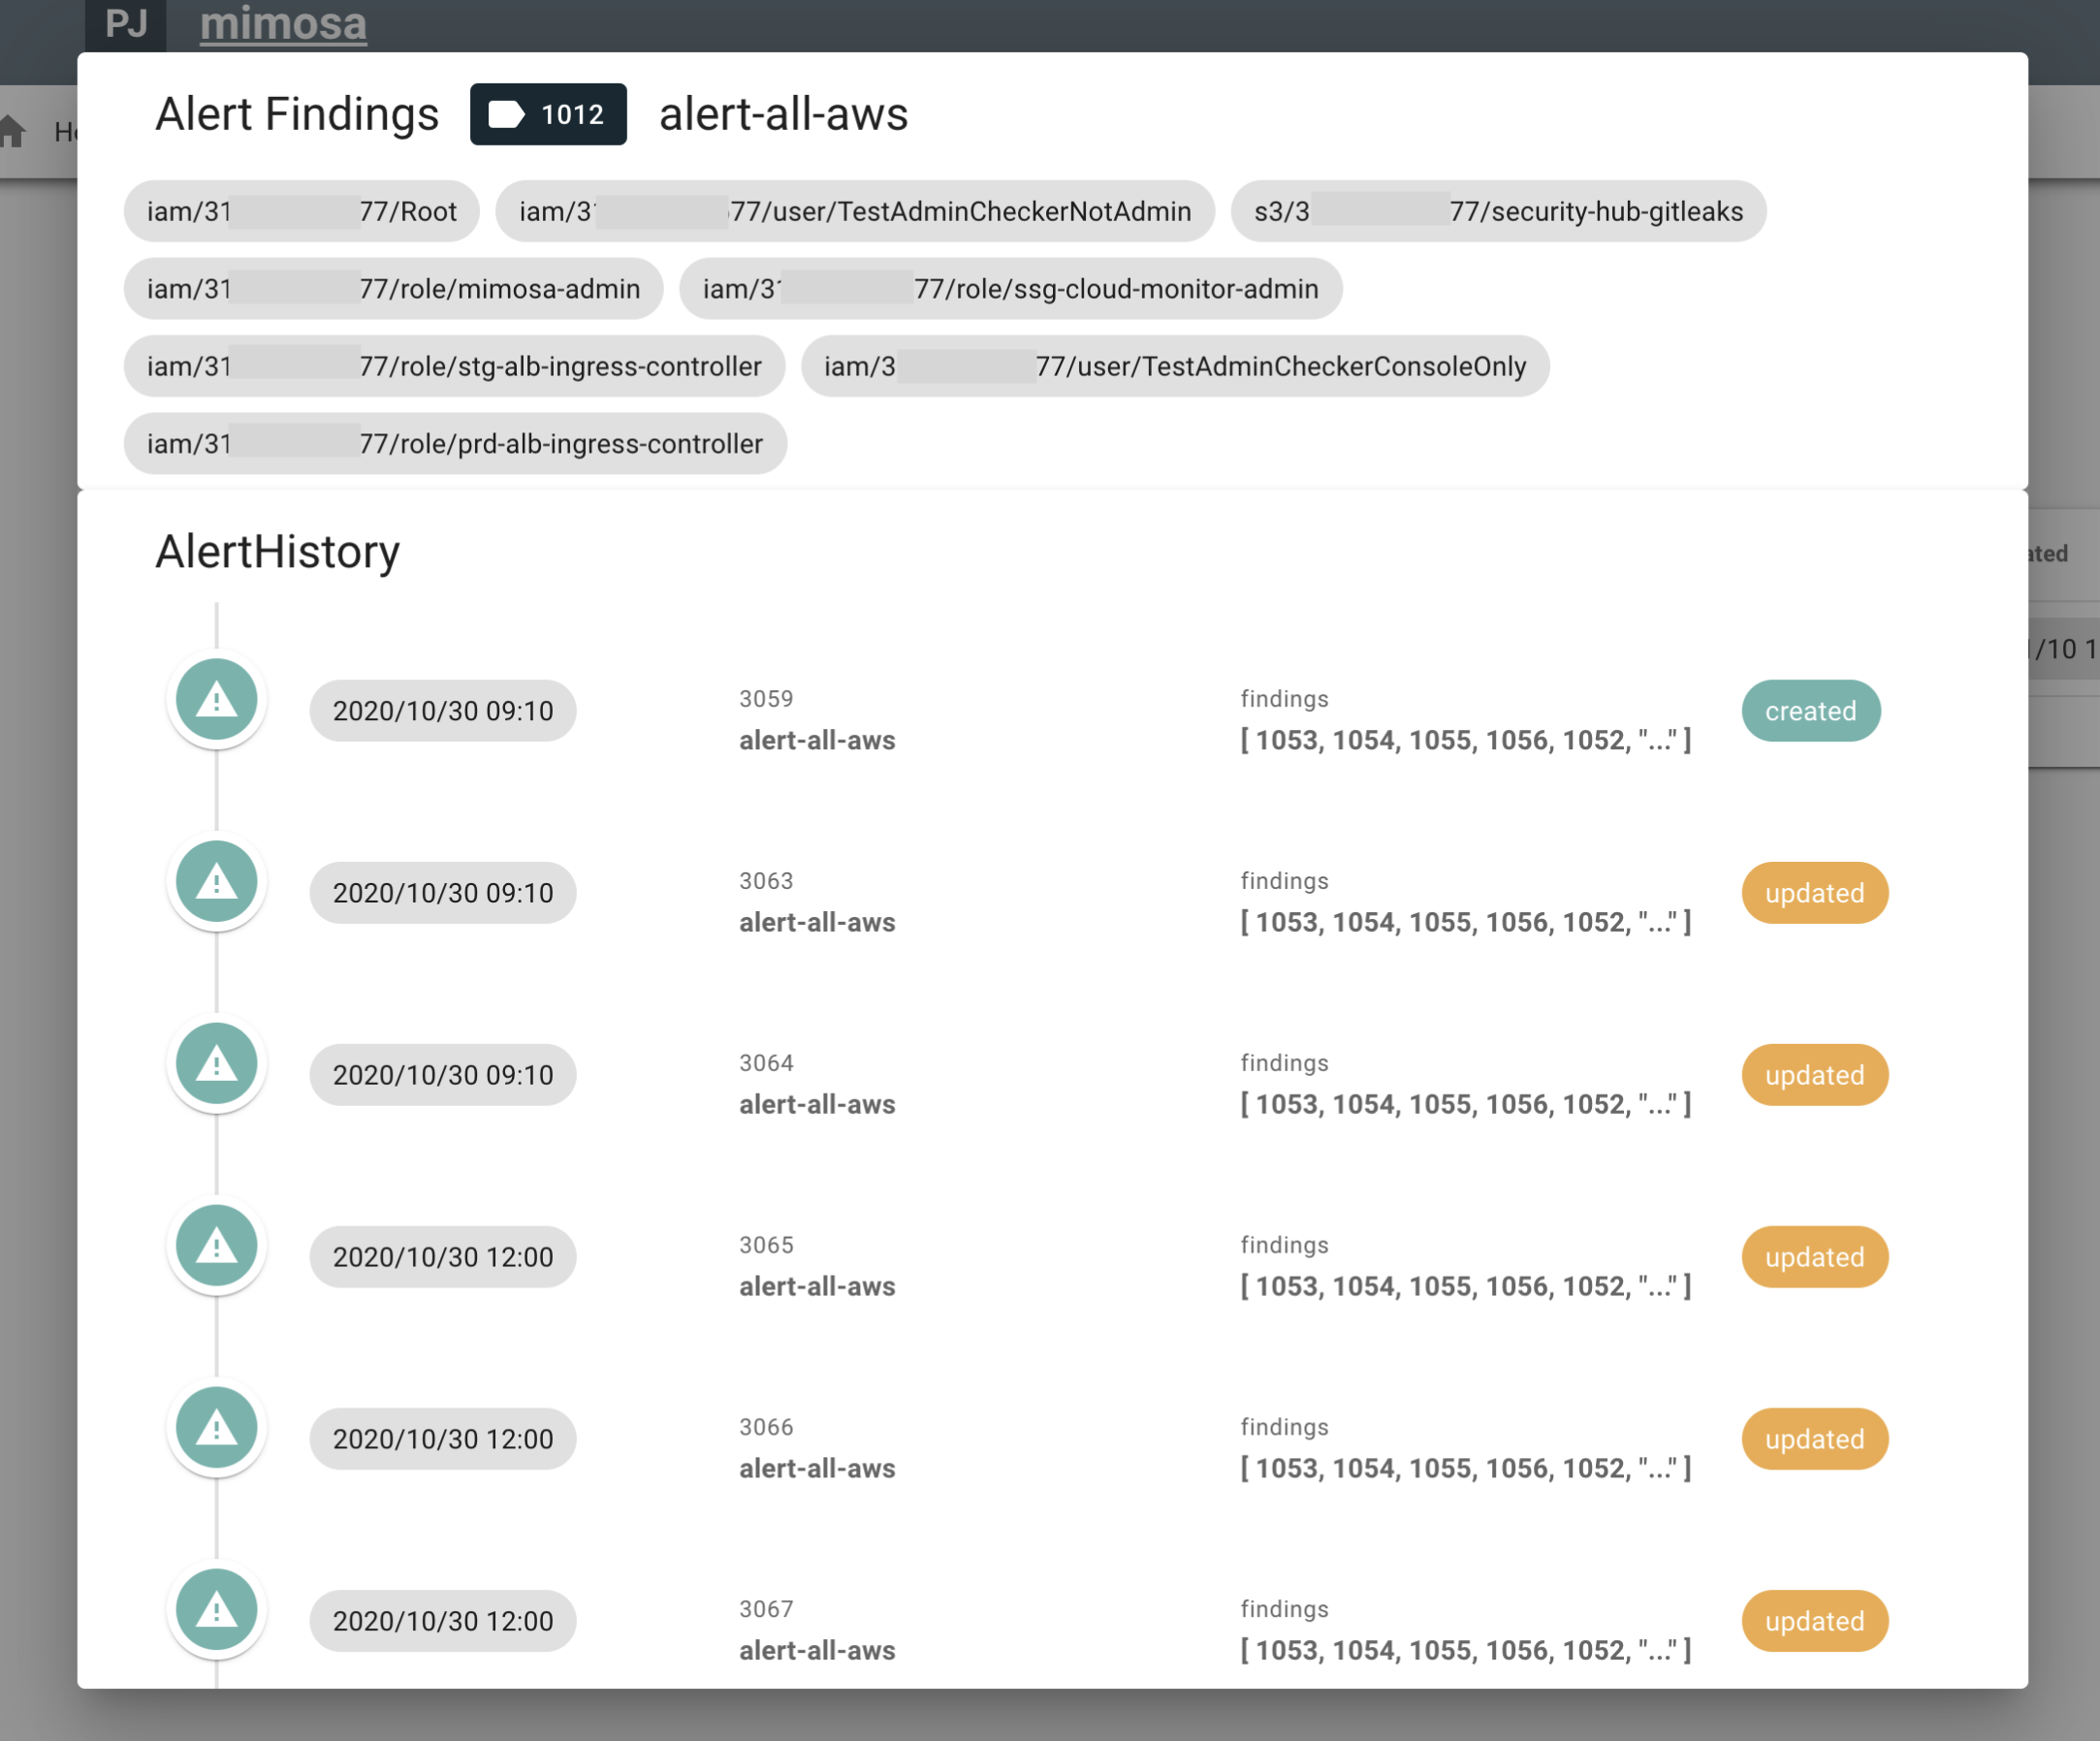
- Links to Findings that match the alert conditions will be displayed.
- At the bottom of the screen, you can check the update history of the alert.
Setting Alerts
- By setting the alert conditions in advance, you can automatically determine and notify alerts during data collection.
- You can register multiple alert rules and notification destinations for alert conditions.
- Before creating an alert condition, set up the rules and notifications first.
Setting Alert Rules
- Click Alert > Rule in the left menu.
- Click NEW on the right side of the screen.
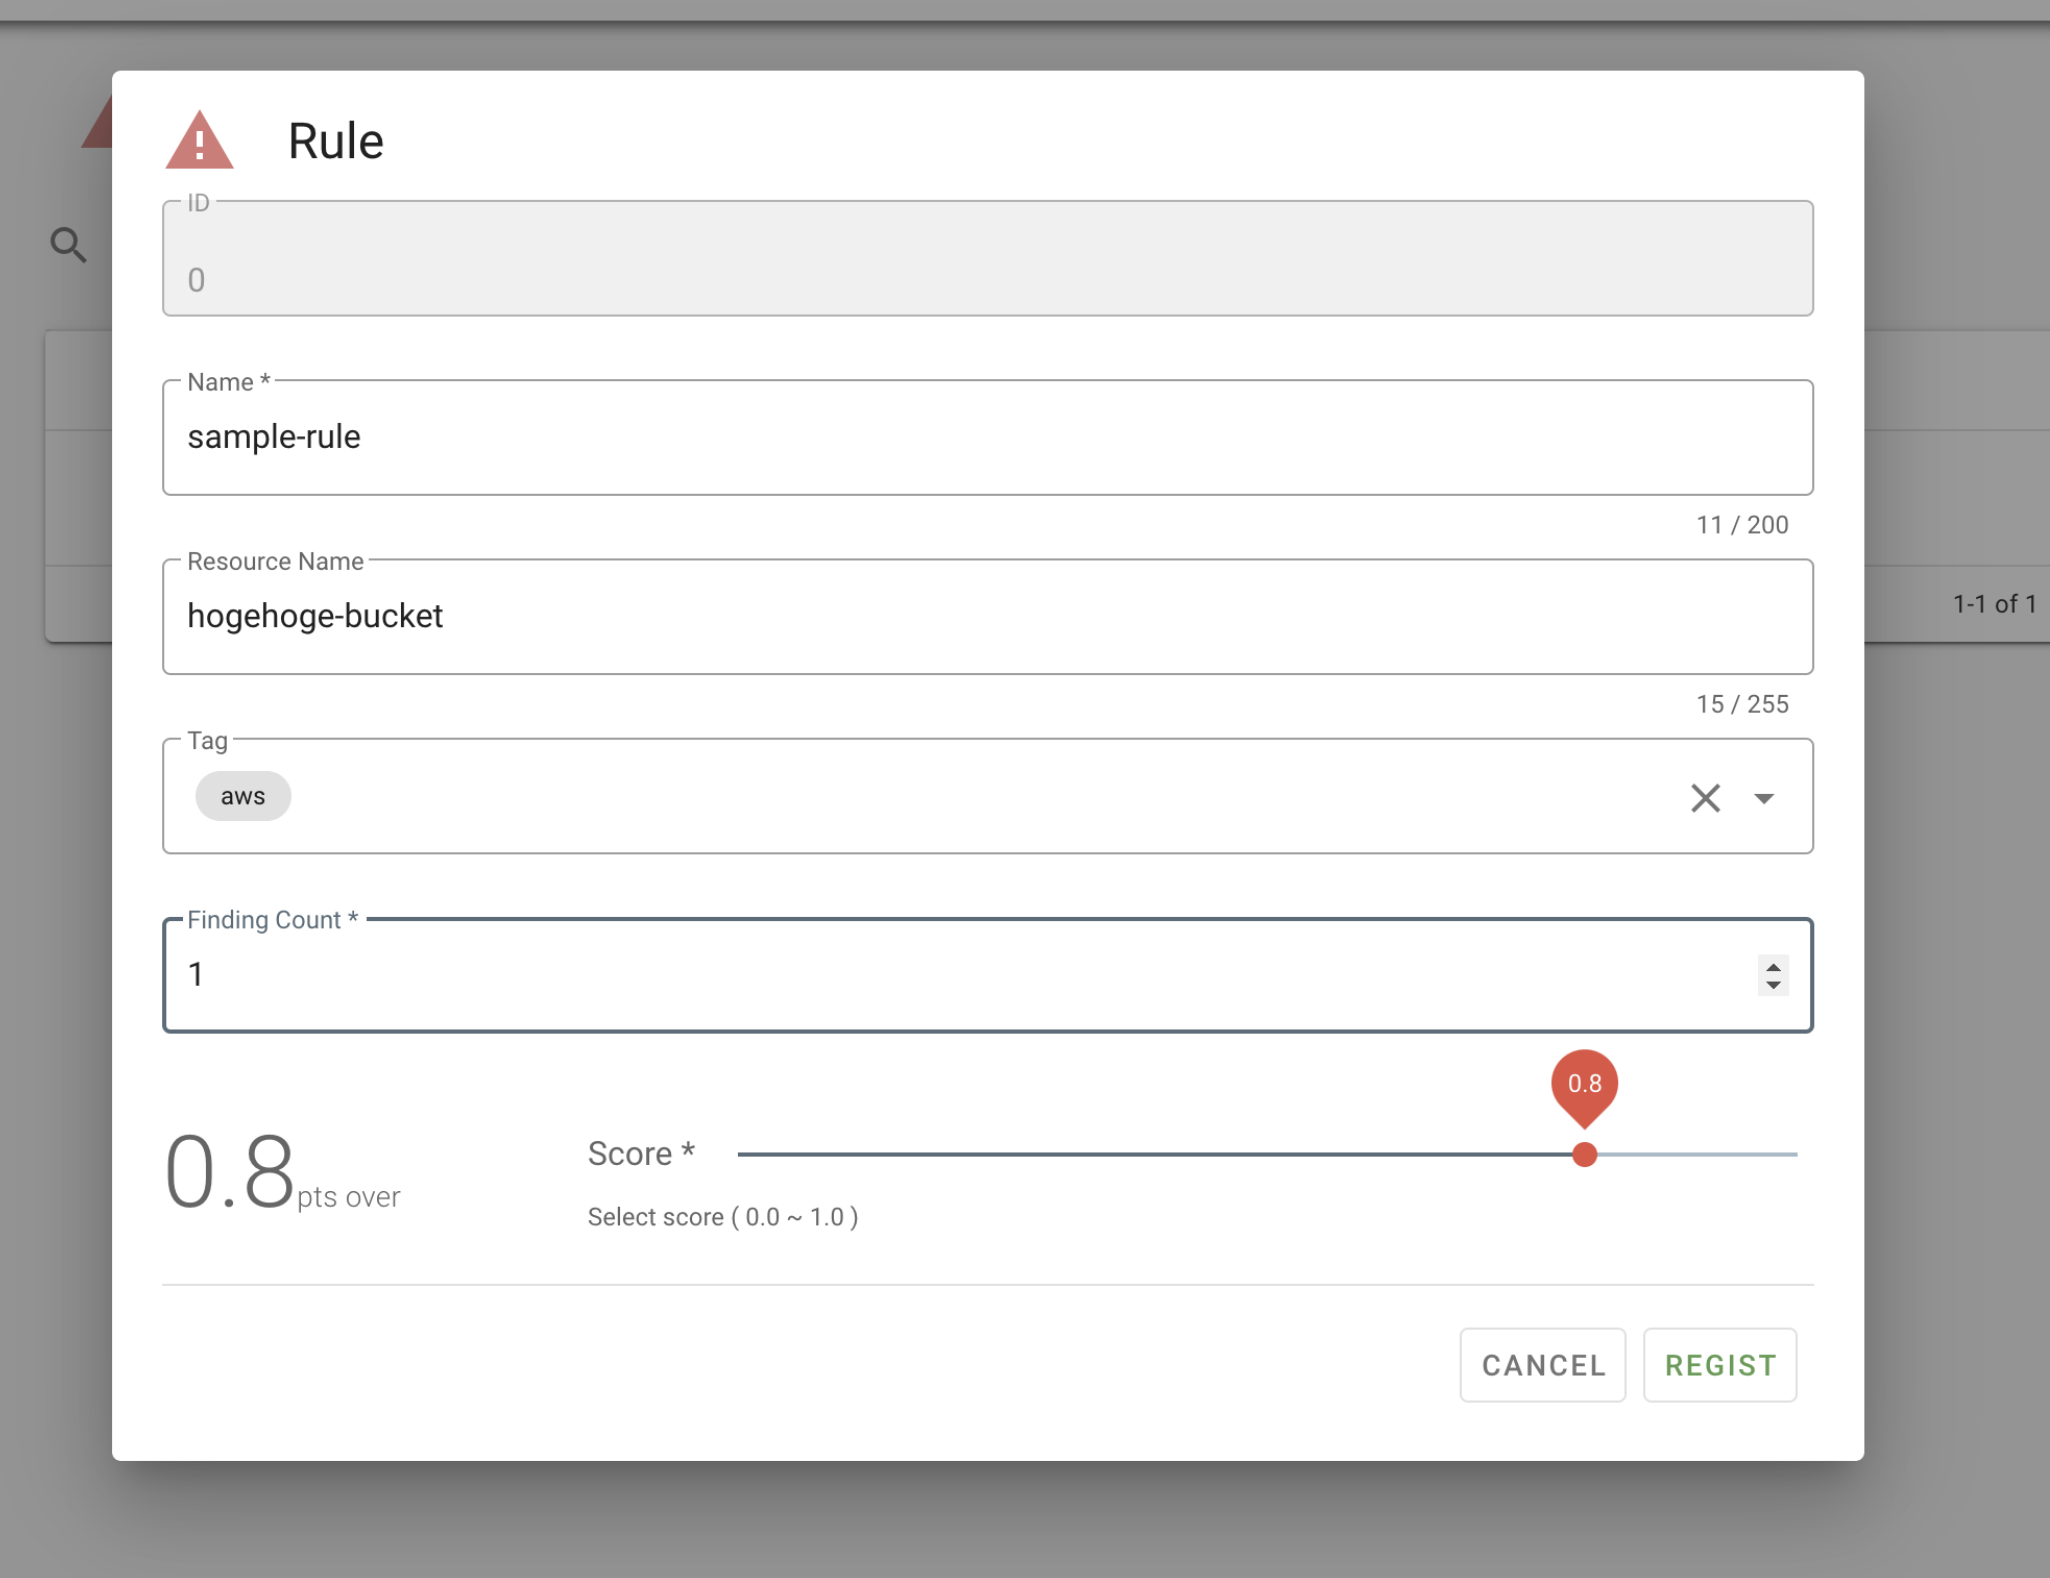
- Fill in the following items and click REGIST.
- Name: Alert name
- [Finding filter conditions]
- ResourceName: Resource name (partial match)
- Tag: Tag name
- FindingCount: The number of Findings that match the above filter conditions
- Score: Finding score (specify the minimum points)
Setting up Notification Destination
- Click on
Alert > Notificationon the left menu - Click on
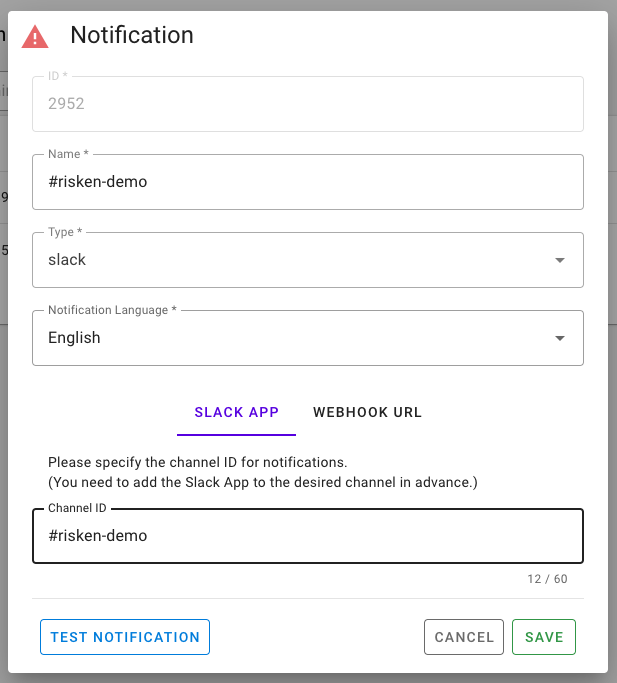
NEWon the right side of the screen - Fill in the required fields and click
REGIST.- Name: Notification name
- Type: Currently only supports
Slack - Notification Language: Please set the notification language.
- Slack Setting: You can choose between notifications from
SlackAppor aWebhookURL.
Slack App
- Channel ID: Specify the destination channel ID or channel name (however, if the channel name is used, notifications may not be sent if Slack changes it).
- Options
- Custom Message: You can customize the notification message.
- To insert a mention, specify the following format:
- User:
<@user_name>(or<@user_id>) - Group:
<!subteam^GROUP_ID>(e.g.<!subteam^S01234567890>) - Special mention:
<!here>, etc. - For details, refer to the Slack official documentation
- User:
- If not entered, the default message is
@xxxx Alert occurred.- The
@xxxxpart changes according to the set Severity.High: @channelMedium: @hereLow: No mention
- The
- To insert a mention, specify the following format:
- Custom Message: You can customize the notification message.
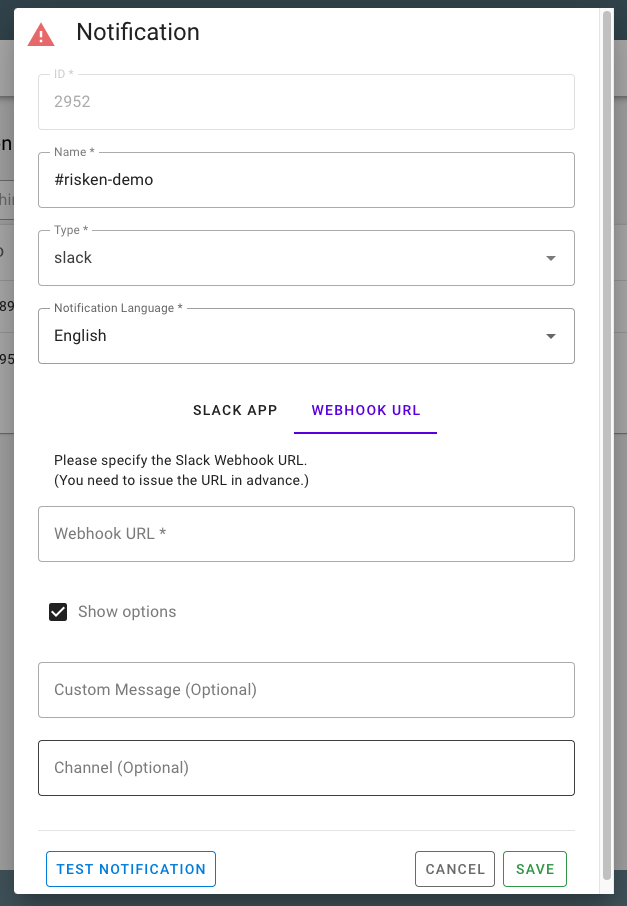
WebhookURL
- Webhook URL: Specify the Webhook URL created with Incomming Webhook
- Notifications will be sent with the channel/icon/name specified in Incomming Webhook
- Options
- Custom Message: You can customize the notification message.
- To insert a mention, specify
<@user_name>or<!here>, etc. - If not entered, the default message is
@xxxx Alert occurred.- The
@xxxxpart changes according to the set Severity.High: @channelMedium: @hereLow: No mention
- The
- To insert a mention, specify
- Custom Message: You can customize the notification message.
- Channel (Depricated): Specify the channel to receive the notification. Currently a deprecated setting.
Setting up Alert Conditions
- Click on
Alert > Conditionon the left menu - Click on
NEWon the right side of the screen - Enter the following information in the Alert Condition dialog and click on
REGIST:- Description: Description of the alert
- Severity: Select the severity level
- High: The most critical level. Mentioned with
@channelwhen notifying - Medium: Intermediate level. Mentioned with
@herewhen notifying - Low: INFO level. No mention when notifying
- High: The most critical level. Mentioned with
- And Or: Specify the evaluation method when setting multiple alert rules
- And: Generates an alert if all rules are
true - Or: Generates an alert if any one or more rules are
true
- And: Generates an alert if all rules are
- Notification Cache Term: A setting to suppress alert notifications. Notifications will not be sent continuously within the specified period
- Default is 1 hour
- Enabled: Switch the alert condition on/off
- Alert Rule: Select the rules you want to enable (multiple)
- Notification Rule: Select the notification destinations you want to enable (multiple)

Organization Alert Notification
In Organization Mode, you can set up Organization Notifications that send alerts across all projects belonging to the Organization. When a project-level alert is triggered, if the Organization that the project belongs to has notification destinations configured, Organization notifications will also be sent automatically.
Difference from Project Alerts
Project alerts consist of three elements: rules, conditions, and notifications. For now, Organization notifications only support configuring notification destinations
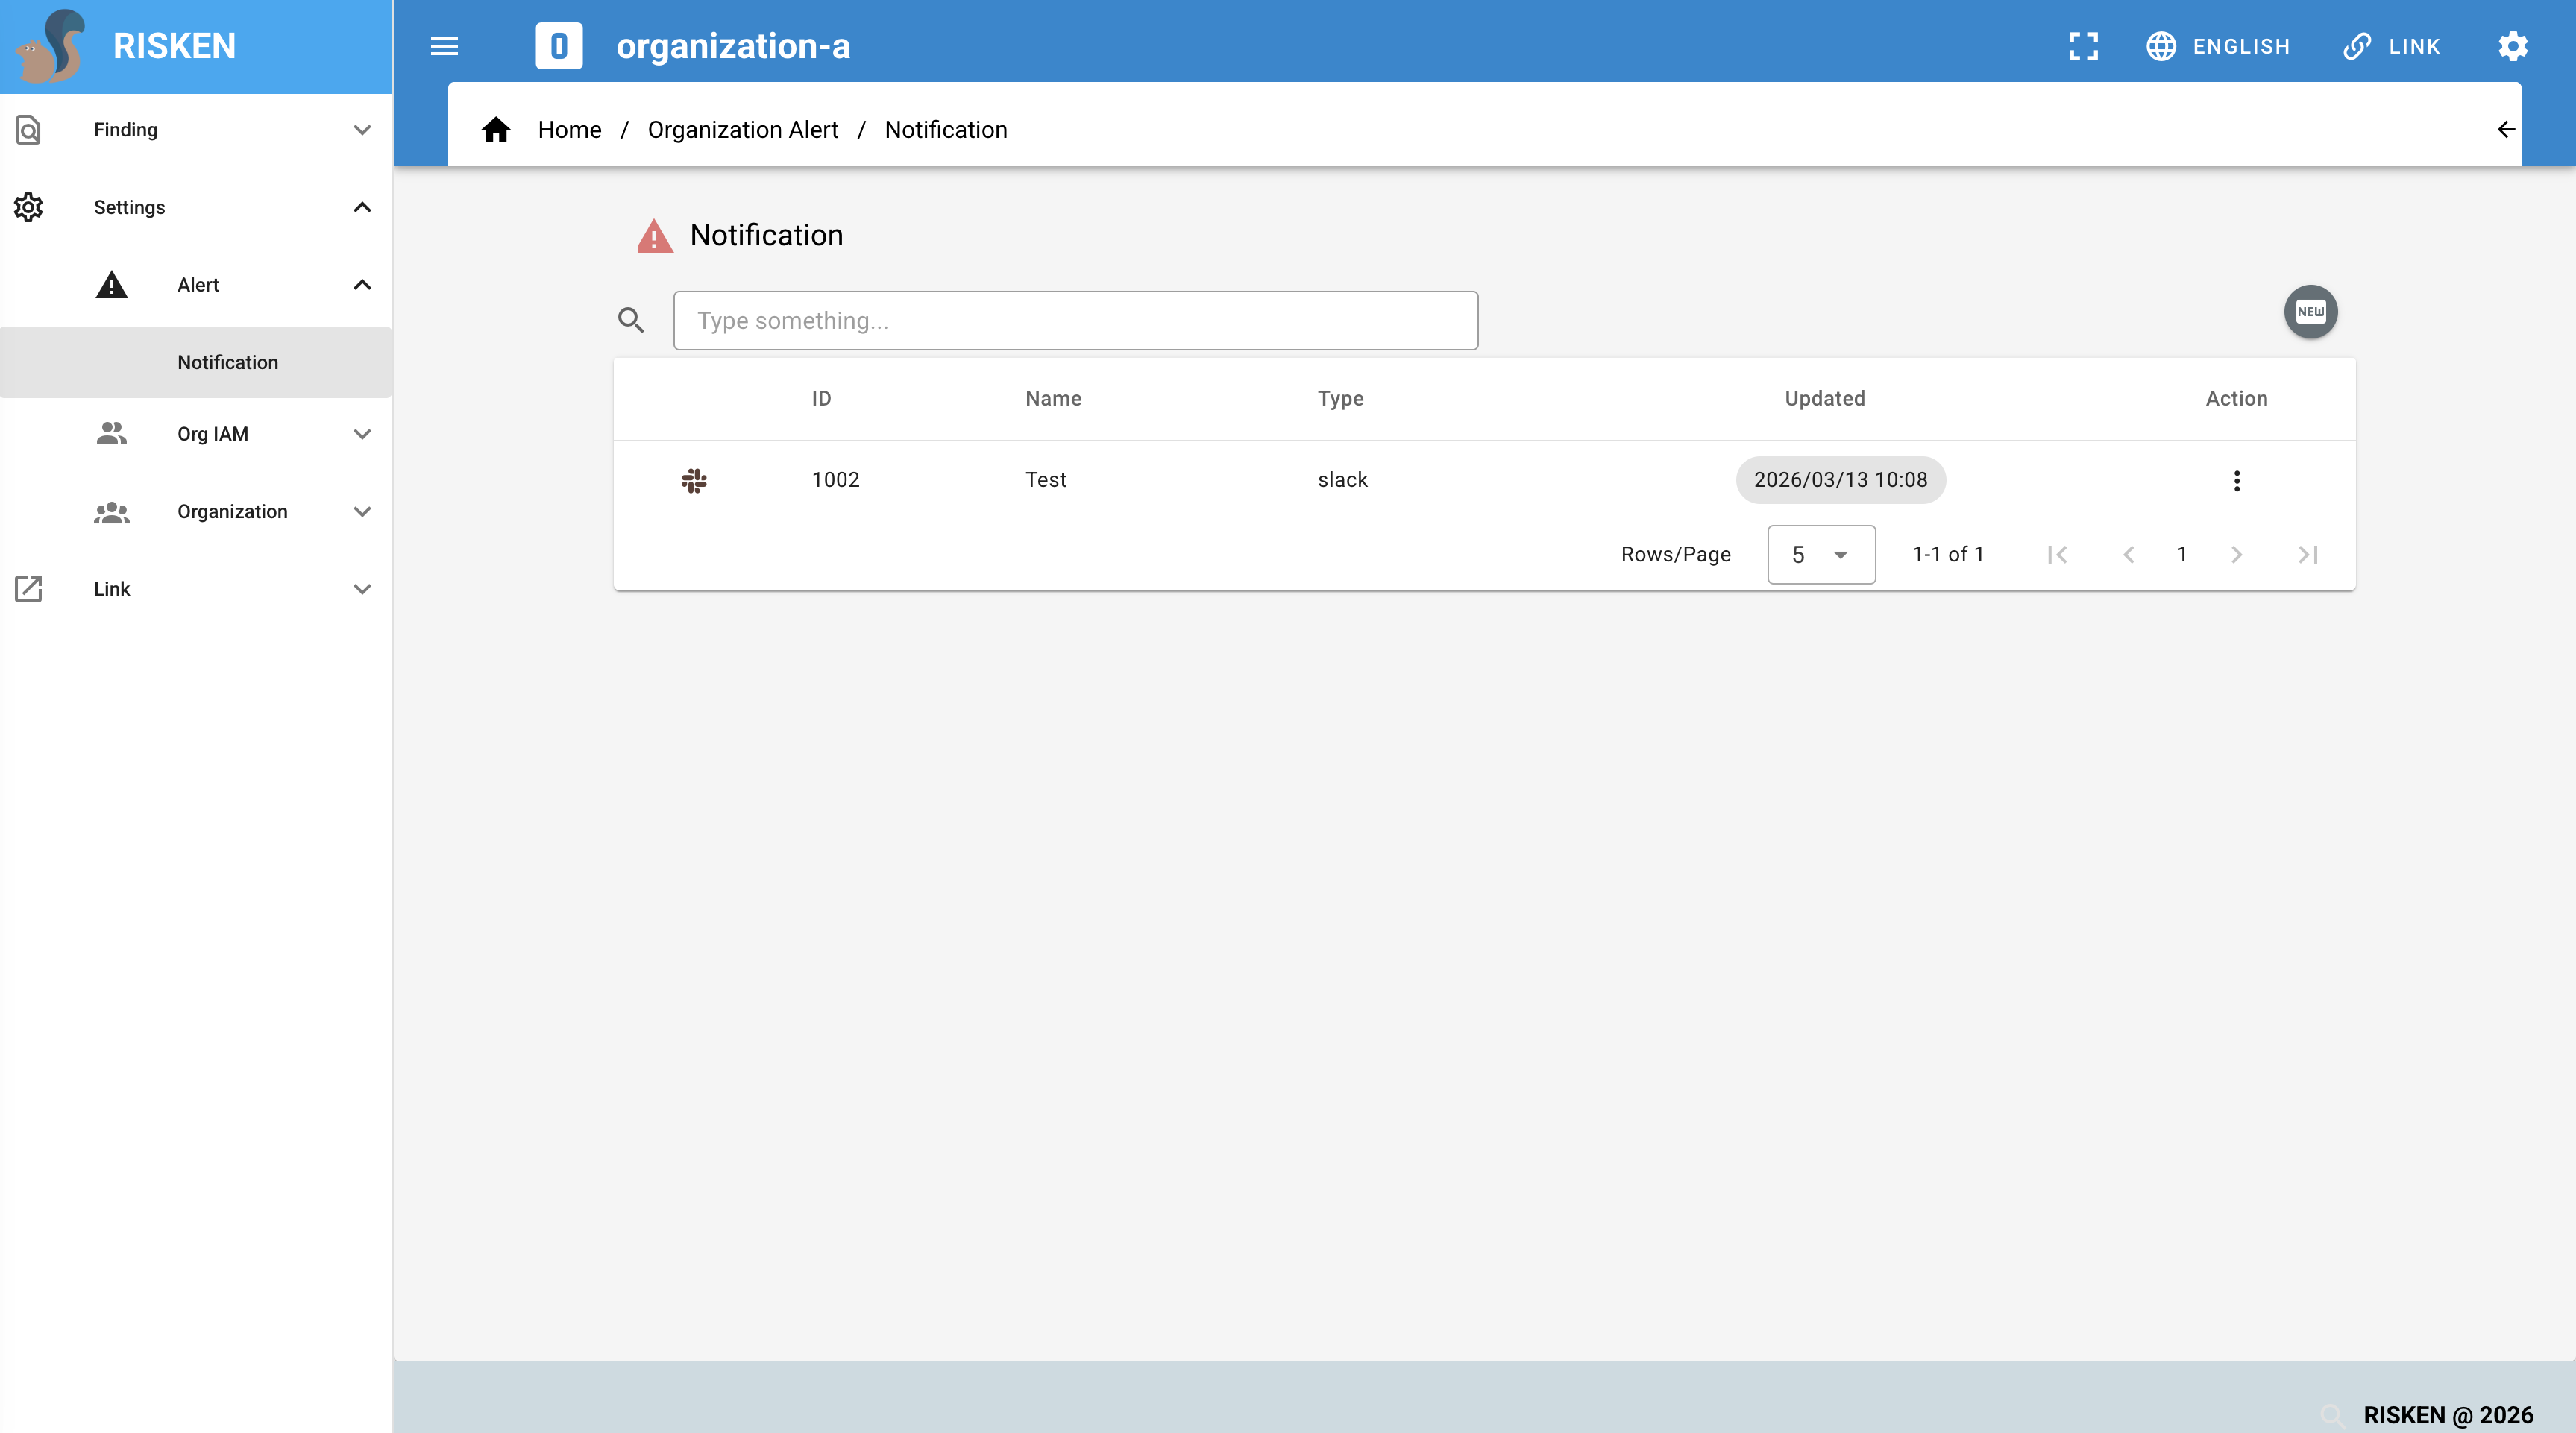
Setting Organization Notification Destinations
- Switch to Organization Mode
- Click
Settings > Alert > Notificationin the left menu - Click
NEWon the right side of the screen - Fill in the required fields and click
REGIST- Name: Notification name
- Type: Currently only supports
Slack - Notification Language: Set the notification language
- Slack Setting: You can choose between
SlackApporWebhookURLnotifications - For details on the settings, see Setting up Notification Destination
Alert Exclusion Settings
After RISKEN performs regular data source scans, it evaluates and generates alerts based on registered alert conditions. However, you can exclude alerts from the evaluation target by performing the following operation.
Setting an Alert to Pending status
- If there is an alert in
Pendingstatus, notifications for that alert condition will not be sent.- Only the history data of the alert will be saved.
- When the problem is resolved and the alert status becomes
Deactive, new alerts will be generated. - *Alert lifecycle:
Active<->Pending(manually updated) ->Deactive
- You can set an alert to
Pendingstatus by performing the following operation.- Go to the
Alert > Alertscreen. - Click on
Pendingfrom the action button on the right side of the list. 
- Go to the
Setting a Finding to Pending status
- Findings that are known to have no issues can be excluded from alert evaluation by setting them to
Pendingstatus. - You can set a Finding to
Pendingstatus by performing the following operation.- Go to the
Finding > Findingscreen. - Click on
Pend Findingfrom the action button on the right side of the list. 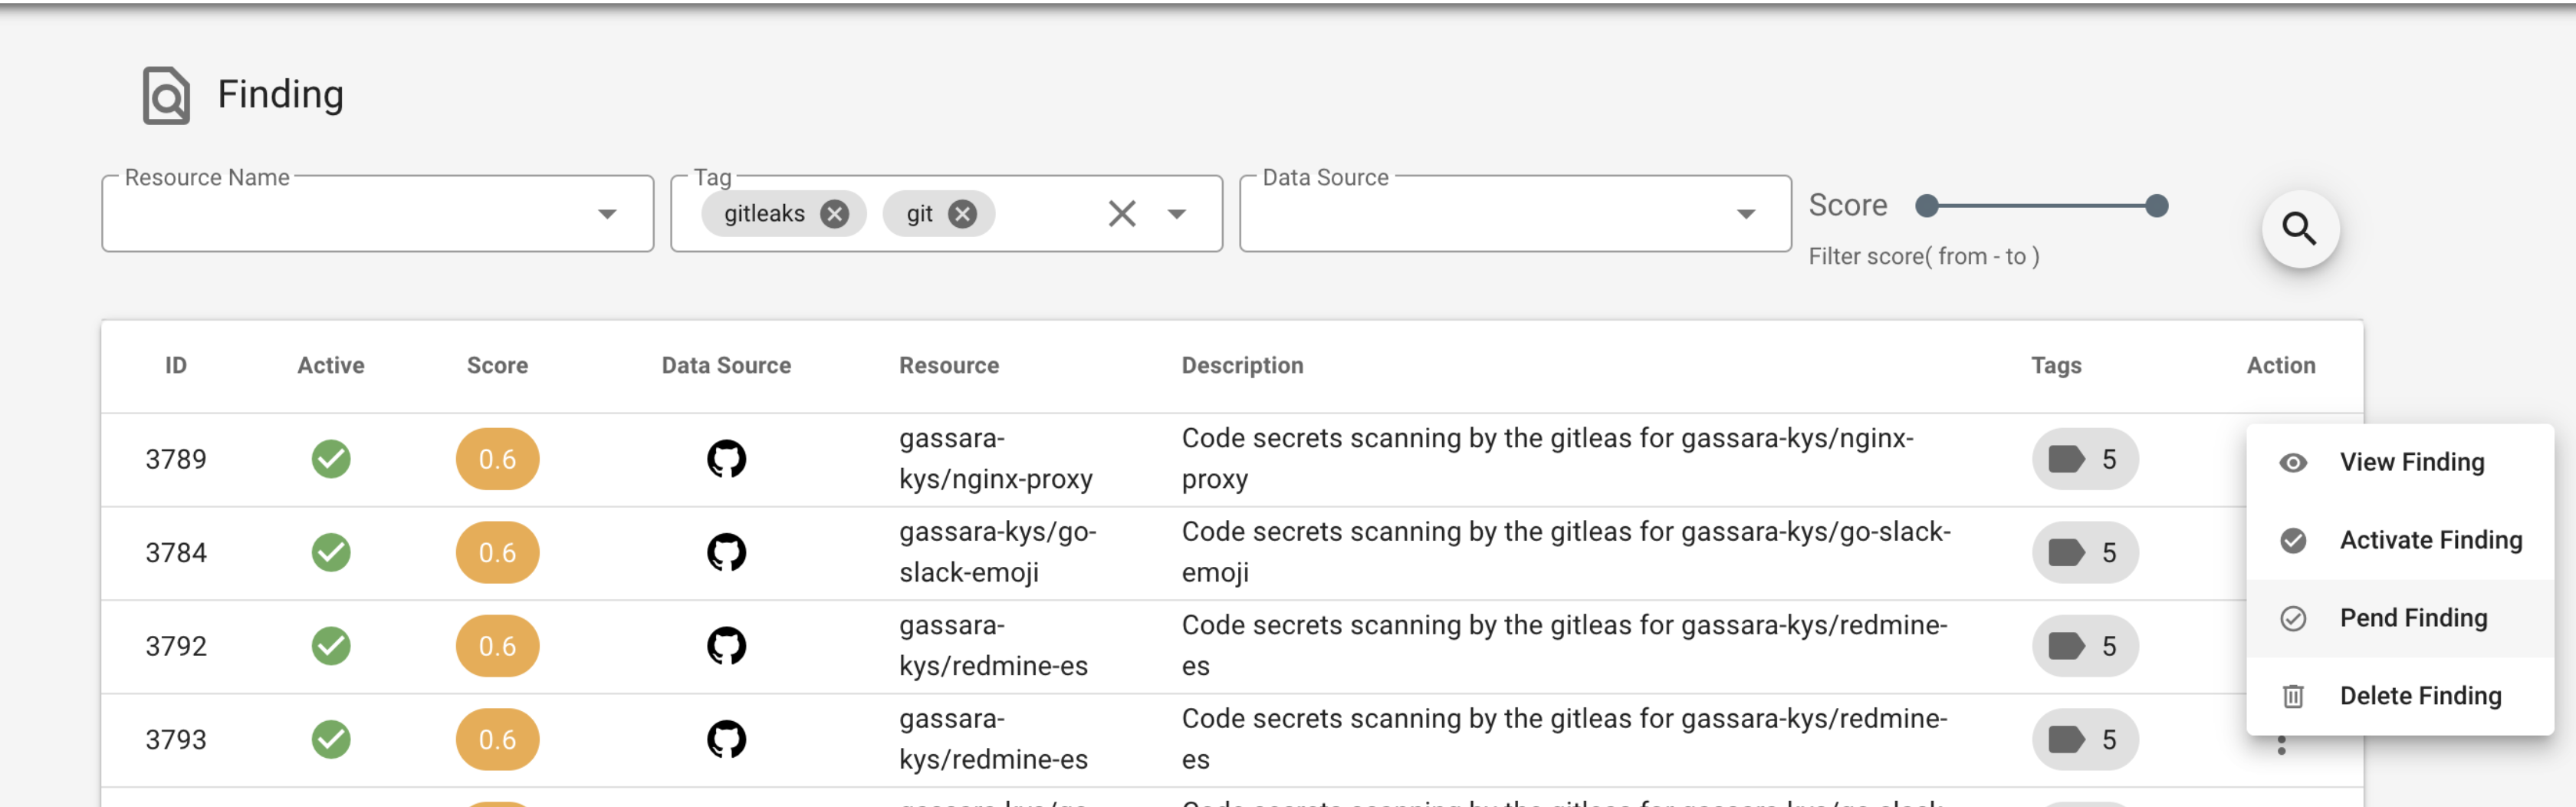
- You can also set multiple findings to
Pendingstatus at once. - For details, please refer to Deleting/Pending Findings.
- Go to the